
1. 데이터 타입
public class Datatype{
	public static void main(String[] args) {
		System.out.println(6); //number
		System.out.println("six"); //string
		System.out.println("6"); //String 6

		System.out.println(6 + 6); //12
		System.out.println("6" + "6"); //66

		System.out.println(6 * 6); //36
//		System.out.println("6"*"6");

		System.out.println("1111".length()); //4
//		System.out.println(1111.length());
	}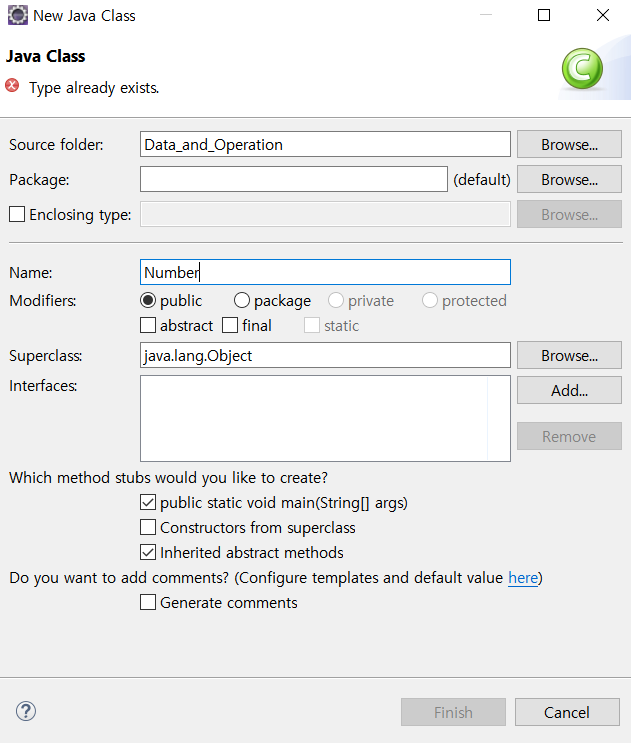
}New > Class를 선택해서 public static void main(String[] args) 체크, Class의 이름을 지정하여 파일을 생성해주면 메소드가 자동생성된다.
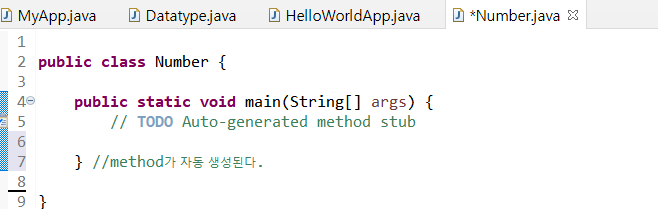
2. 숫자와 연산
기본적인 사칙연산과 Math 클래스의 메소드를 사용하여 복잡한 연산을 수행할 수 있다.
public class Number {

	public static void main(String[] args) {
		//Operator
		System.out.println(6 + 2);
		System.out.println(6 - 2);
		System.out.println(6 * 2);
		System.out.println(6 / 2);

		System.out.println(Math.floor(Math.PI));
		System.out.println(Math.ceil(Math.PI));
	} //method가 자동 생성된다.

}3. 문자열의 표현
public class StringApp {

	public static void main(String[] args) {

		//Character  vs  String
		System.out.println("Hello World"); //String
//		System.out.println('Hello World'); //ERROR. 작은 따옴표는 Character을 의미
		System.out.println('H');
		System.out.println("H"); //한글자여도 쌍따옴표를 사용하였으므로 문자열

		System.out.println("Hello"
				+ "World"); //줄바꿈이 이루어지진 않는다.
		System.out.println("Hello \n World");//new line의 약자 n (개행문자\n)

		//escape
		System.out.println("Hello \"World\""); //Hello "World" 출력

	}
}public class StringOperation {
public static void main(String[] args) {
System.out.println("Hello World".length());
System.out.println("Hello, [[name]] ... bye".replace("[[name]]", "egoing"));
}
}
replace 함수를 이용해 특수한 문자열을 다른 문자열로 교체할 수 있다.
4. 변수
public class Variable {
	public static void main(String[] args) {
		int a = 1; //Number -> integer(정수)
		System.out.println(a); // 1

		double b = 1.1; // Real Number -> double(실수)
		System.out.println(b); //1.1

		String c = "Hello World";
		System.out.println(c);
	}
}public class Letter {
public static void main(String[] args) {
String name = "leezche";
System.out.println("Hello, "+ name);
double VAT = 10.0;
System.out.println(VAT); // 변수의 이름을 변수의 성질을 의미하도록 지정하기
}
}변수를 선언하고 출력해보았다.
5. 데이터 타입의 변환
(casting:형변환)
public class Casting {

	public static void main(String[] args) {
		double a = 1.1;
		double b = 1; //정보의 손실이 없다.
		System.out.println(b);

//		int c = 1.1; //ERROR 정보의 손실이 생긴다.
		double d = 1.1;
		int e = (int) 1.1; //1.1이라는 double타입의 수를 강제로 interger로 casting한다.
		System.out.println(e); // 1
	}
}public class Casting {
public static void main(String[] args) {
double a = 1.1;
double b = 1; //정보의 손실이 없다.
System.out.println(b);
// int c = 1.1; //ERROR 정보의 손실이 생긴다.
double d = 1.1;
int e = (int) 1.1; //1.1이라는 double타입의 수를 강제로 integer로 casting한다.
System.out.println(e); // 1
//1 to string
String s = Integer.toString(1);
System.out.println(s.getClass()); //class java.lang.String
}
}getClass() : 변수의 데이터 타입을 확인하는 함수
Integer.toString([Int형 변수]) : int형 변수를 문자열 데이터타입으로 바꿔준다.
6. IoT 프로그램 만들기
import org.opentutorials.iot.Elevator;
import org.opentutorials.iot.Lighting;
import org.opentutorials.iot.Security;

public class OkJavaGoinHome {

	public static void main(String[] args) {

		String id = "JAVA APT 507";

		// Elevator call
		Elevator myElevator = new Elevator(id));
		myElevator.callForUp(1);

		// Security off
		Security mySecurity = new Security(id);
		mySecurity.off();

		// Light on
		Lighting hallLamp = new Lighting(id + " / Hall Lamp");
		hallLamp.on();

		Lighting floorLamp = new Lighting(id + " / Hall Lamp");
		floorLamp.on();
	}
}egoing님의 github, java-iot 리포지토리에 있는 소스코드들을 다운받아 같은디렉토리 안에서 해당 파일을 작성할 수 있다. IoT의 작동을 시뮬레이션할 수 있다.
7. 디버깅

Run As 옆에 있는 벌레 버튼을 눌러 디버깅을 실행한다.
* 디버깅이란 ? : 프로그래밍 과정 중에 발생하는 오류나 비정상적인 연산, 버그를 찾고 수정하는 과정을 말한다.
중지점을 눌러 Step Over(F6)로 코드 한줄한줄을 실행하고 변수의 Name과 Value를 확인하며 오류를 해결해나갈 수 있다. 또한 Step Into(F5)로 현재 커서가 위치한 코드의 세부적인 내용을 확인할 수 있다.
8. 입력과 출력
C언어처럼 콘솔 창에 입력을 하고 출력하는 기능을 Java에서도 구현할 수 있다.
import javax.swing.JOptionPane;

import org.opentutorials.iot.DimmingLights;
import org.opentutorials.iot.Elevator;
import org.opentutorials.iot.Lighting;
import org.opentutorials.iot.Security;

public class OkJavaGoinHomeInput {

	public static void main(String[] args) {

		String id = JOptionPane.showInputDialog("Enter a ID");
		String bright = JOptionPane.showInputDialog("Enter a Bright level");

		// Elevator call
		Elevator myElevator = new Elevator(id);
		myElevator.callForUp(1);

		// Security off
		Security mySecurity = new Security(id);
		mySecurity.off();

		// Light on
		Lighting hallLamp = new Lighting(id + " / Hall Lamp");
		hallLamp.on();

		Lighting floorLamp = new Lighting(id + " / floor Lamp");
		floorLamp.on();

		DimmingLights moodLamp = new DimmingLights(id + " moodLamp");
		moodLamp.setBright(Double.parseDouble(bright));
		moodLamp.on();
	}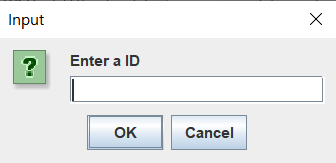
}JOptionPane 메소드를 import하고 showInputDialog 함수를 사용하면 다음과 같은 Input 창이 뜨게 된다.
Double.parseDouble([String 데이터]) : 문자열 데이터를 Double 자료형으로 바꾸어준다.
9. 직접 Compile하고 Run 하기
IDE를 쓰지 않고 cmd창에서 Compile하는 실습을 진행해보겠다.
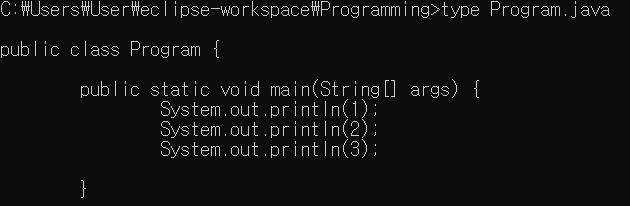
C드라이브에서 java와 javac를 입력해 정상 설치가 되었음을 확인하고 work-space 디렉토리로 들어가 컴파일할 파일의 이름을 확인한다. Window 기준으로 type 명령어를 사용하면 파일의 내용이 확인 가능하다.
실행하기 위한 방법으로 첫번째, class 파일 이름 앞에 java 명령어를 붙여서 실행한다.

javac 명령어로 자바 파일을 불러오면 실행결과는 출력되지 않지만 컴파일이 이루어져 class파일이 생성된다.

라이브러리가 포함되어 있을 경우, class path 명령어인 cp를 이용하여 라이브러리 파일이 위치한 디렉토리의 경로를 표시해주면 정상 컴파일 된다.

10. API
API란? :
Application Programming Interface, OS나 프로그래밍 언어가 제공하는 기능을 제어할 수 있게 만든 인터페이스이다. 쉽게, 프로그램과 프로그램을 연결해주는 다리라고 할 수 있다.
즉, 내가 만든 프로그램이 날씨 정보, 공공 데이터 등과 같은 타 프로그램을 활용할 수 있도록 도와주는 매개체이다.
UI란? :
User Interface, 사용자와 기기(하드 or 소프트웨어) 를 이어주는 매개체라고 할 수 있다.
https://docs.oracle.com/javase/7/docs/api/
Overview (Java Platform SE 7 )
java.applet Provides the classes necessary to create an applet and the classes an applet uses to communicate with its applet context. java.awt Contains all of the classes for creating user interfaces and for painting graphics and images. java.awt.color Provides classes for color spaces. java.awt.dat...
docs.oracle.com
java에서 제공하는 라이브러리에 대한 설명이 있는 링크이다.
Math 클래스를 예시로 보자.
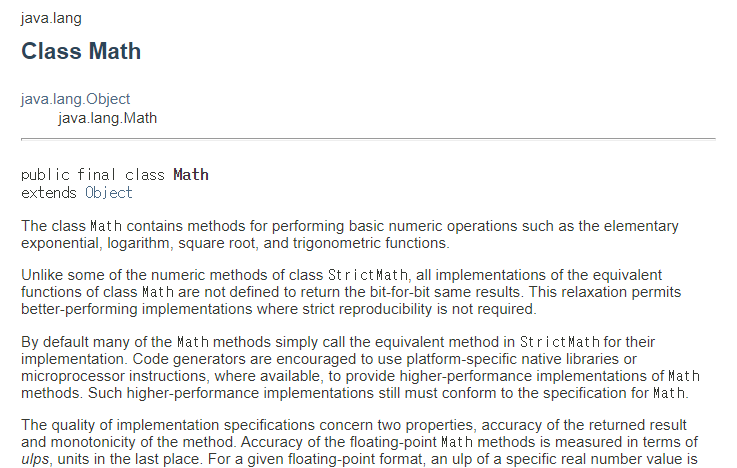
java. lang은 Math 클래스가 속해있는 패키지 이름이다.
패키지는 자바의 디렉토리와 같은 의미이며, 인스턴스는 클래스 구조로 컴퓨터 저장공간에서 할당된 실체를 의미한다. 인스턴스의 개념을 이해하기 위해 다음 코드와 주석을 참고해보자.
import java.io.FileNotFoundException;
import java.io.IOException;
import java.io.PrintWriter;

public class InstanceApp {

	public static void main(String[] args) throws IOException {

		PrintWriter p1 = new PrintWriter("result1.txt");
		// p1은 PrintWriter의 복제본 변수
		// p1에 담겨있는 것은 PrintWriter라는 클래스의 인스턴스이다.
		// 데이터 타입을 PrintWriter로 설정해줌으로써 p1변수에는 PrintWriter 클래스의 인스턴스만 들어갈 수 있도록 설정
		p1.write("Hello 1");
		p1.close();

		PrintWriter p2 = new PrintWriter("result2.txt");
		p2.write("Hello 2");
		p2.close();
	}
}
11. 상속
: 자식이 부모로부터 무언가를 물려받는 것.
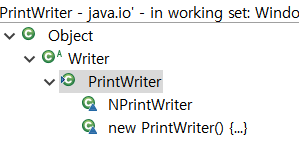
다음은 PrintWriter의 상속관계이다.
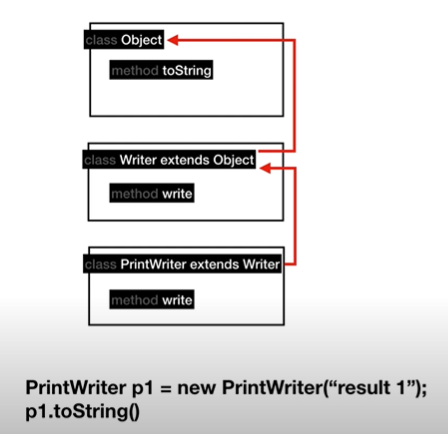
extends라는 명령어로 상속관계를 표현한다.
자바는 기본적으로 object 클래스를 상속받고, 부모클래스에서 상속을 받은 자식클래스는 부모 클래스의 메소드 뿐만 아니라 자신이 직접 생성한 메소드도 사용이 가능하다.
자식 클래스와 부모 클래스는 IS -A관계 가 있는데, 먼저 자식 클래스인 Dog와 부모클래스인 Animal 코드를 보자.
public class Animal{
   String name;
   public void setName(String name){
      this.name = name; //함수 인자로 받은 name을 name 변수에 지정
   }
}

public class Dog extends Animal{
   public void sleep(){
      System.out.println(this.name + " zzz");
   }
   public void main(String args[]){
      Dog dog = new Dog();
      dog.setName("poppy");
      System.out.println(dog.name);
      dog.sleep();
   }
}IS-A관계에 의하면 Animal dog = new Dog();는 가능하나 Dog dog = new Animal();은 가능하지 않다. 즉 특성 클래스의 인스턴스를 생성할 때는 해당 클래스보다 같거나 높은 위치의 클래스만을 자료형으로 사용할 수 있다는 것이다.
'Langauge > Java' 카테고리의 다른 글
| Java의 정석 Chapter2. 변수 (0) | 2022.03.07 |
|---|---|
| Java의 정석 Chapter1. 자바를 시작하기 전에 (0) | 2022.03.07 |
| 점프 투 자바 요약 #객체지향프로그래밍 (0) | 2021.02.25 |
| 점프 투 자바 요약 #제어문 (0) | 2021.02.23 |
| 점프 투 자바 요약 #자료형 (0) | 2021.02.16 |